I’ve been using git full time for the past 4 years, and I wanted to share the most practical tips that I’ve learned along the way. Hopefully, it will be useful to somebody out there. If you are completely new to git, I suggest reading Git Cheat Sheet first. This article is aimed at somebody who has been using git for three months or more.
Table of Contexts:
- Parameters for better logging
- Log actual changes in a file
- Only Log changes for some specific lines in file
- Log changes not yet merged to the parent branch
- Extract a file from another branch
- Some notes on rebasing
- Remember the branch structure after a local merge
- Fix your previous commit, instead of making a new commit
- Three stages in git, and how to move between them
- Revert a commit, softly
- See diff-erence for the entire project (not just one file at a time) in a 3rd party diff tool
- Ignore the white space
- Only “add” some changes from a file
- Discover and zap those old branches
- Stash only some files
- Good commit messages
- Git Auto-completion
- Create aliases for your most frequently used commands
- Quickly find a commit that broke your feature (EXTRA AWESOME)
1. Parameters for better logging
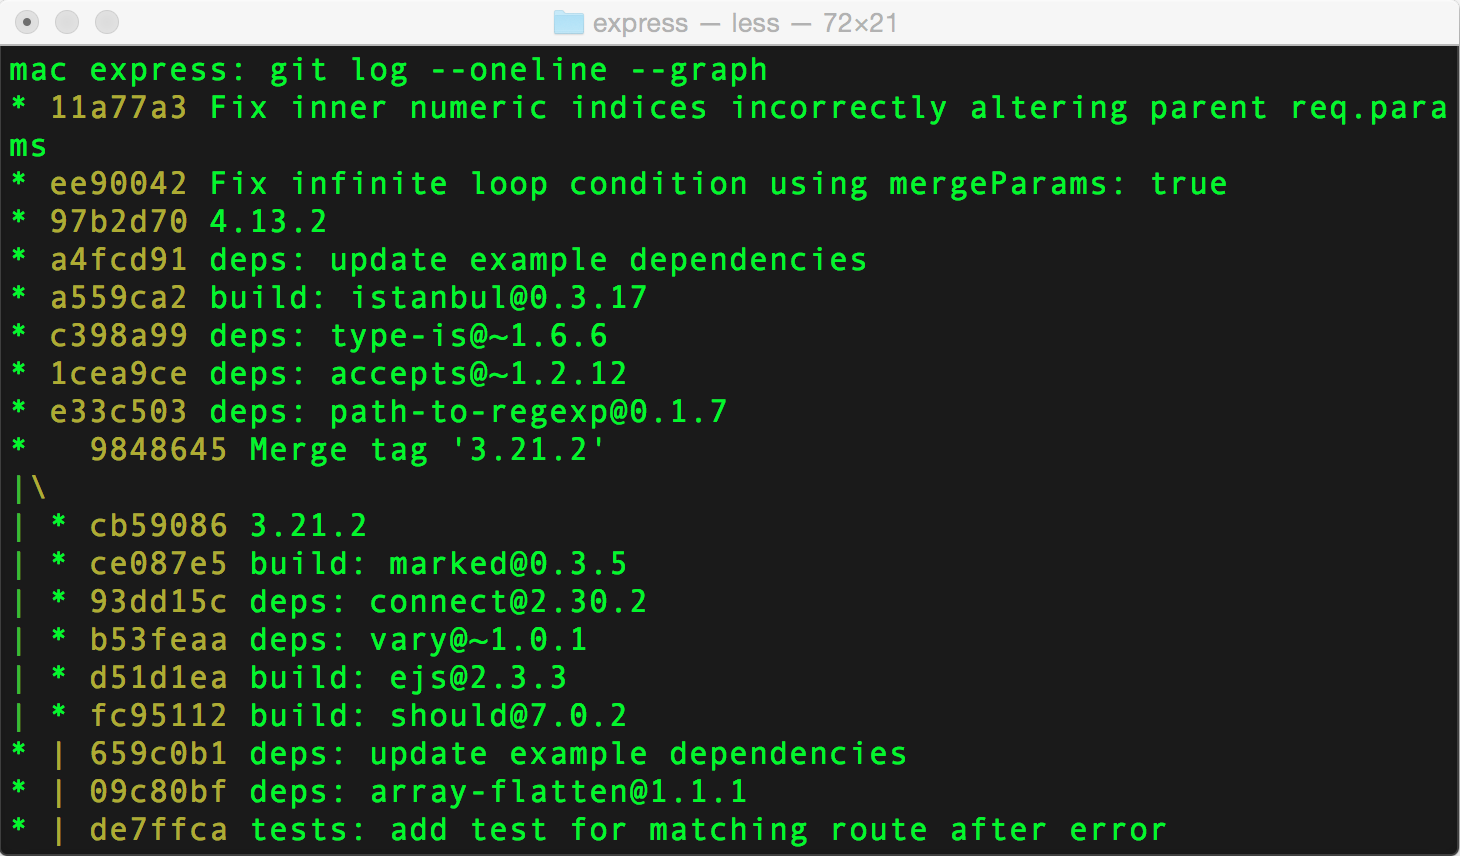
Sample Commandgit log --oneline --graph
Chances are, by now you’ve used git log. It supports a number of command line parameters, which are very powerful, especially when used in combination. Here are the ones that I use the most:
--author="Alex Kras"– Only show commits made by a certain author--name-only– Only show names of files that changed--oneline– Show commit data compressed to one line--graph– Show dependency tree for all commits--reverse– Show commits in reverse order (Oldest commit first)--after– Show all commits that happened after certain date--before– Show all commits that happened before certain data
For example, I once had a manager who required weekly reports submitted each Friday. So every Friday I would just run: git log --author="Alex Kras" --after="1 week ago" --oneline, edit it a little and send it in to the manager for review.
Git has a lot more command line parameters that are handy. Just run man git log and see what it can do for you.
If everything else fails, git has a --pretty parameter that let’s you create a highly customizable output.
2. Log actual changes in a file
Sample Commandgit log -p filename
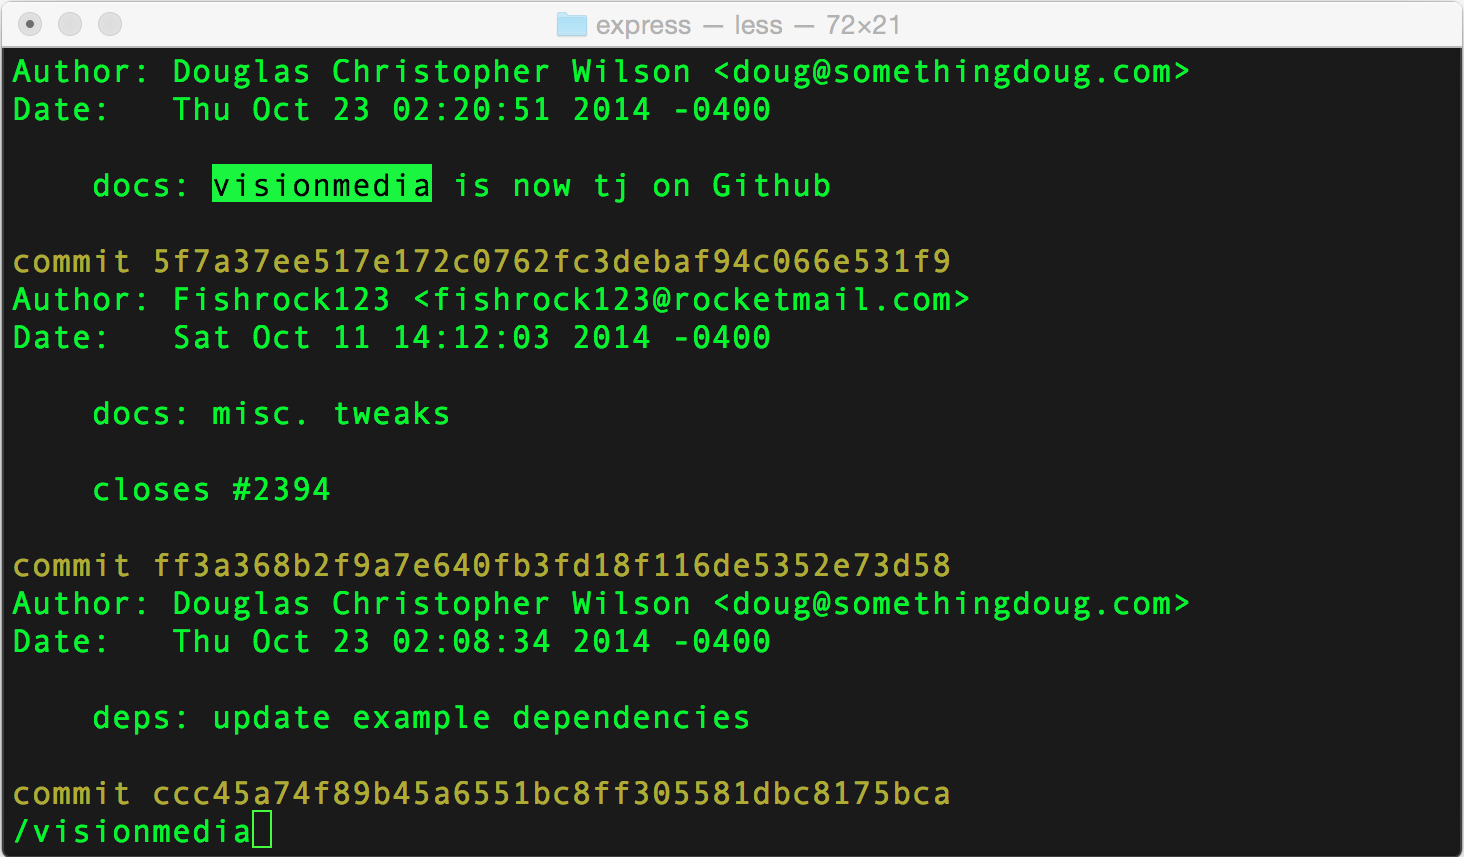
git log -p or git log -p filename lets you view not only the commit message, author, and date, but actual changes that took place in each commit.
Then you can use the regular less search command of “slash” followed by your search term/{{ "{{" }}your-search-here}} to look for changes to a particular keyword over time. (Use lower case n to go to the next result, and upper case N to go to the previous result).
3. Only Log changes for some specific lines in a file
Sample Commandgit log -L 1,1:some-file.txt
You can use git blame filename to find the person responsible for every line of the file.

git blame is a great tool, but sometimes it does not provide enough information.
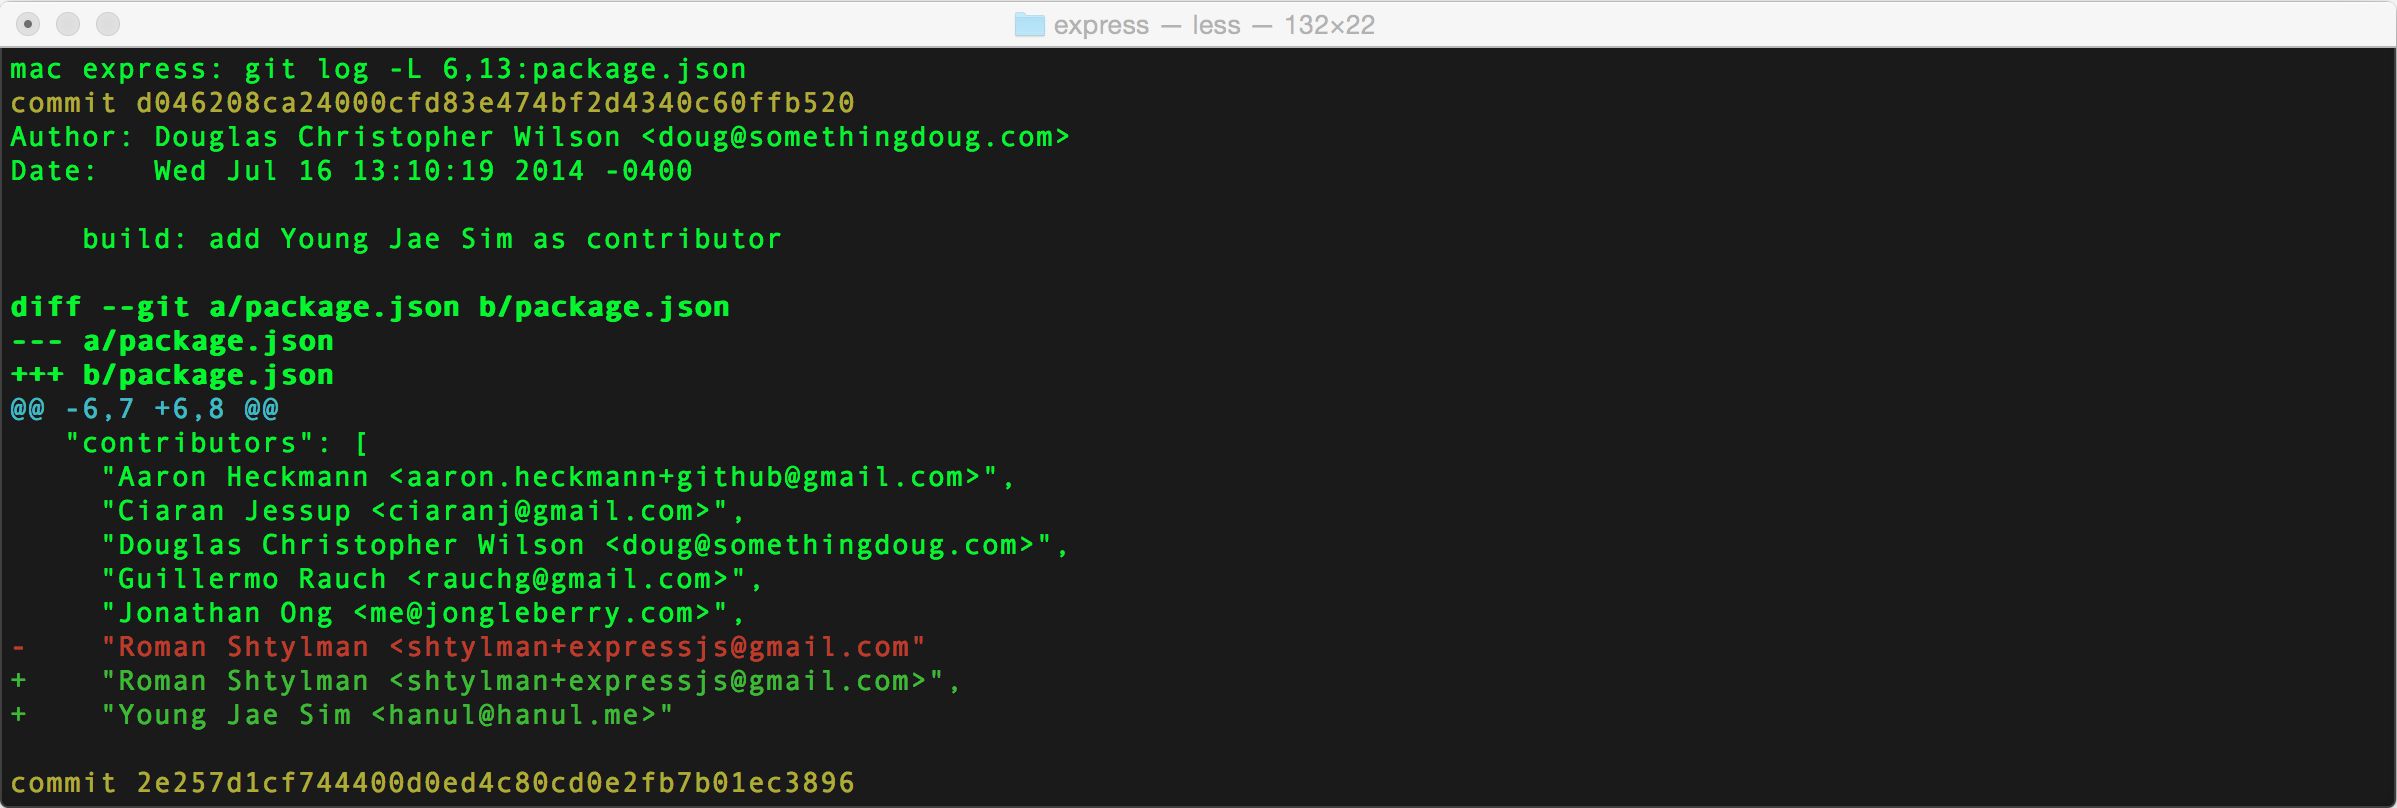
An alternative is provided by git log with a -L flag. This flag allows you to specify particular lines in a file that you are interested in. Then Git would only log changes relevant to those lines. It’s kind of like git log -p with focus.
git log -L 1,1:some-file.txt
4. Log changes not yet merged to the parent branch
Sample:git log --no-merges master..
If you ever worked on a long-lived branches, with multiple people working on it, chances are you’ve experienced numerous merges of the parent branch(i.e. master) into your feature branch. This makes it hard to see the changes that took place on the master branch vs. the changes that have been committed on the feature branch and which have yet to be merged.
git log --no-merges master.. will solve the issue. Note the --no-merges flag indicate to only show changes that have not been merged yet to ANY branch, and the master.. option, indicates to only show changes that have not been merged to master branch. (You must include the .. after master).
You can also do git show --no-merges master.. or git log -p --no-merges master.. (output is identical) to see actual file changes that are have yet to be merged.
https://www.blogger.com/null
5. Extract a file from another branch
Sample:git show some-branch:some-file.js
Sometimes it is nice to take a pick at an entire file on a different branch, without switching to this branch.
You can do so via git show some-branch-name:some-file-name.js, which would show the file in your terminal.
You can also redirect the output to a temporary file, so you can perhaps open it up in a side by side view in your editor of choice.
git show some-branch-name:some-file-name.js > deleteme.js
Note: If all you want to see is a diff between two files, you can simple run:
git diff some-branch some-filename.js
https://www.blogger.com/null
6. Some notes on rebasing
Sample:git pull -—rebase
We’ve talked about a lot of merge commits when working on a remote branch. Some of those commits can be avoided by using git rebase.
Generally I consider rebasing to be an advanced feature, and it’s probably best left for another post.
Even git book has the following to say about rebasing.
Ahh, but the bliss of rebasing isn’t without its drawbacks, which can be summed up in a single line: Do not rebase commits that exist outside your repository If you follow that guideline, you’ll be fine. > If you don’t, people will hate you, and you’ll be scorned by friends and family.
https://git-scm.com/book/en/v2/Git-Branching-Rebasing#The-Perils-of-Rebasing
That being said, rebasing is not something to be afraid of either, rather something that you should do with care.
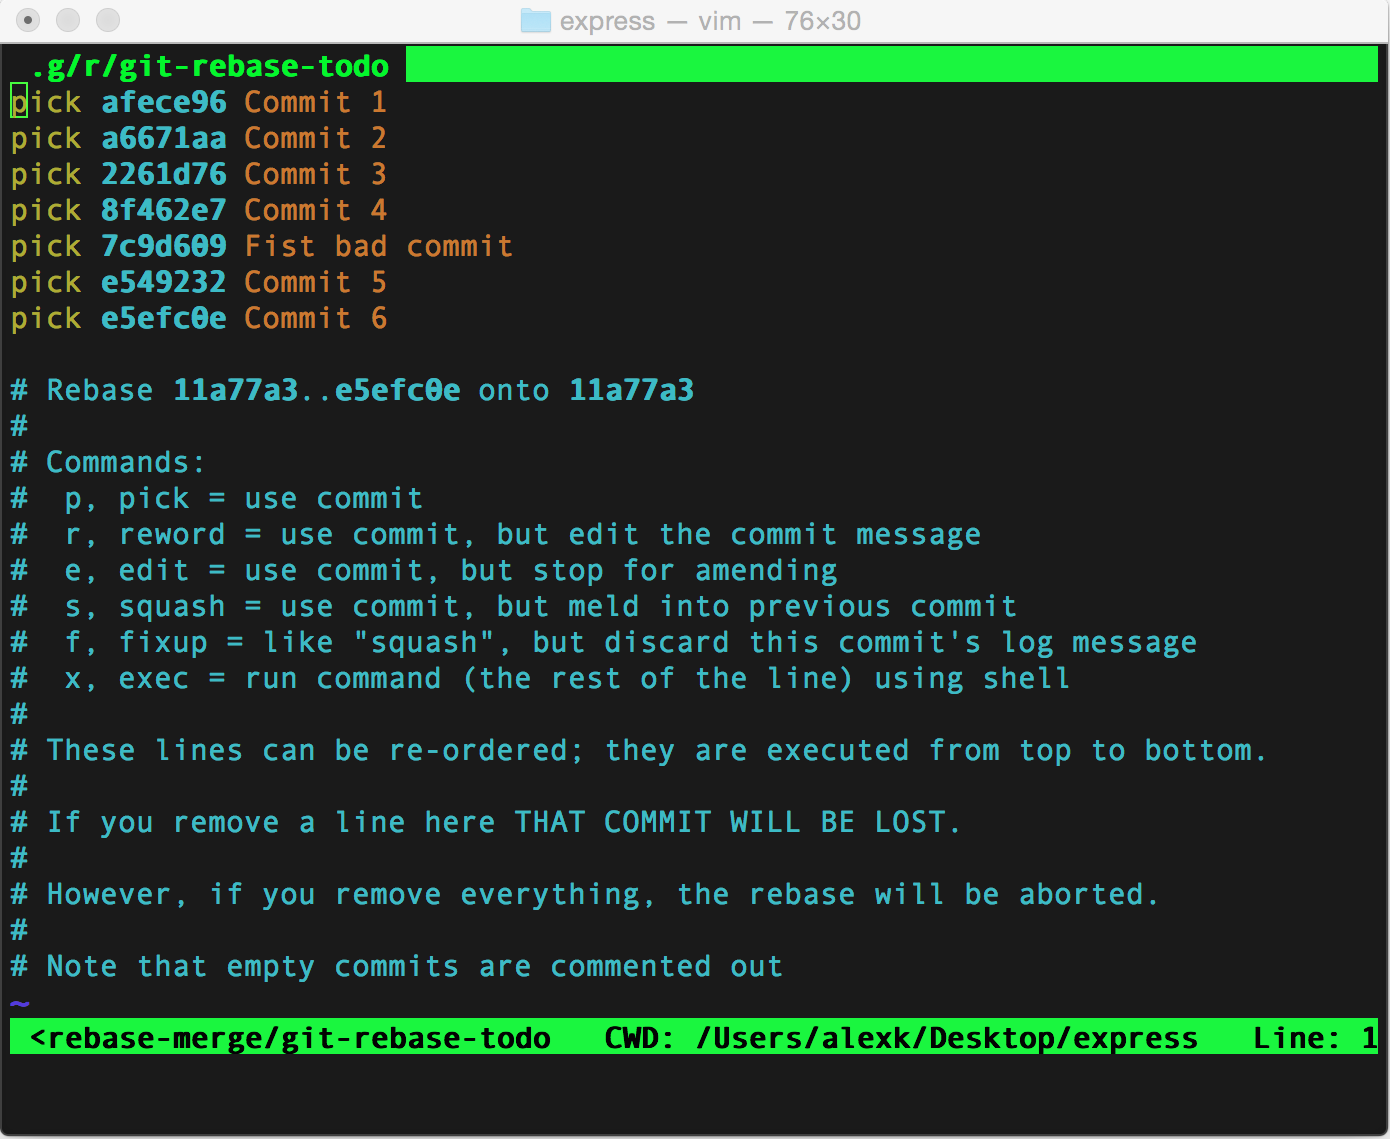
Probably the best way to rebase is using interactive rebasing, invoked via git rebase -i {{ "{{" }}some commit hash}}. It will open up an editor, with self explanatory instruction. Since rebasing is outside of the scope of this article, I’ll leave it at that.
One particular rebase that is very helpful is git pull --rebase.
For example, imagine you are working on a local version of a master branch, and you made one small commit. At the same time, somebody else checked in a week worth of work onto the master branch. When you try to push your change, git tells you to do a git pull first, to resolve the conflict. Being a good citizen that you are, you do a git pull to end up with the following commit message auto generated by git.
Merge remote-tracking branch ‘origin/master’
While this is not a big deal and is completely safe, it does clutter log history a bit.
In this case, a valid alternative is to do a git pull --rebase instead.
This will force git to first pull the changes, and then re-apply(rebase) your un-pushed commits on top of the latest version of the remote branch, as if they just took place. This will remove the need for merge and the ugly merge message.
https://www.blogger.com/null
7. Remember the branch structure after a local merge
Sample:git merge --no-ff
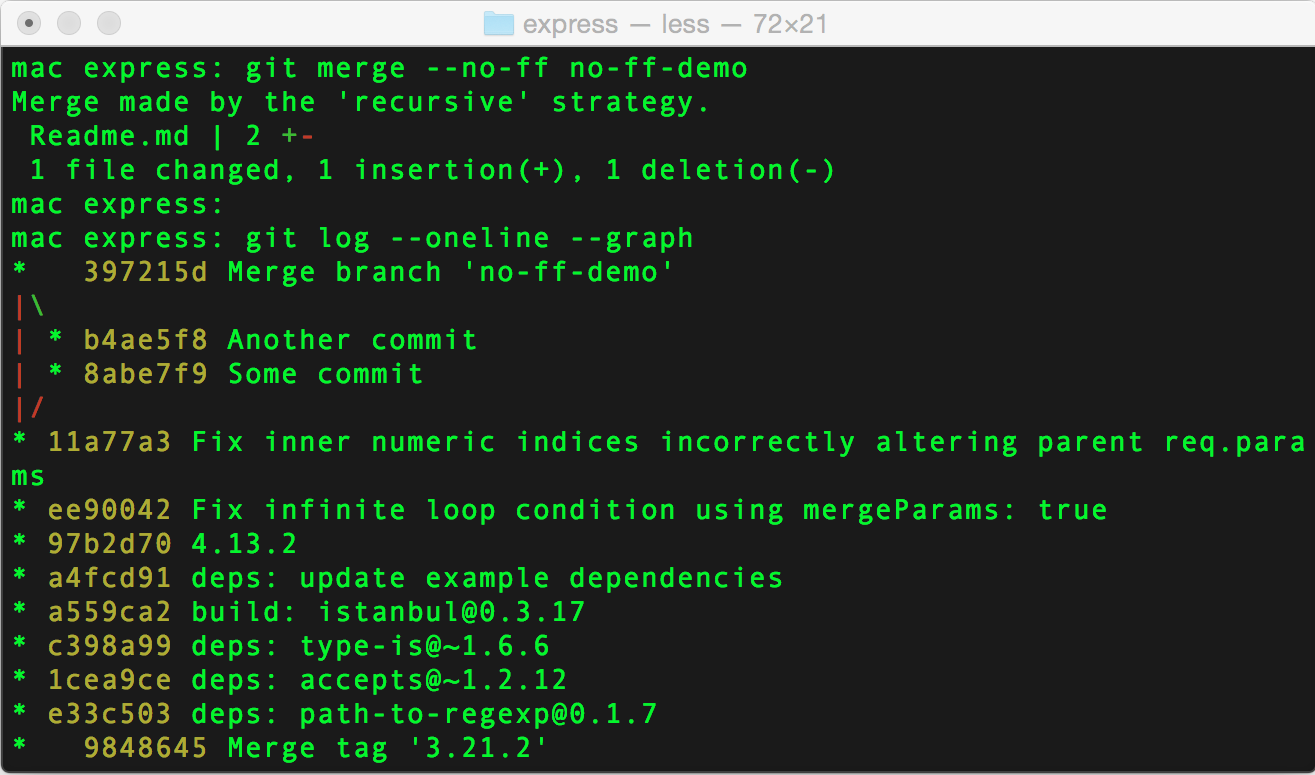
I like to create a new branch for every new bug or feature. Among other benefits, it helps me to get a great clarity on how a series of commits may relate to a particular task. If you ever merged a pull request on github or a similar tool, you will in fact be able to nicely see the merged branch history in git log --oneline --graph view.
If you ever try to merge a local branch, into another local branch, you may notice git has flatten out the branch, making it show up as a straight line in git history.
If you want to force git to keep branches history, similarly to what you would see during a pull request, you can add a --no-ff flag, resulting in a nice commit history tree.
git merge --no-ff some-branch-name
8. Fix your previous commit, instead of making a new commit
Samplegit commit --amend
This one is pretty straightforward.
Let say you made a commit and then realized you made a typo. You could make a new commit with a “descriptive” message typo. But there is a better way.
If you haven’t pushed to the remote branch yet, you can simply do the following:
- Fix your typo
- Stage the newly fixed file via
git add some-fixed-file.js - Run
git commit --amendwhich would add the most recent changes to your latest commit. It will also give you a chance to edit the commit message. - Push the clean branch to remote, when ready
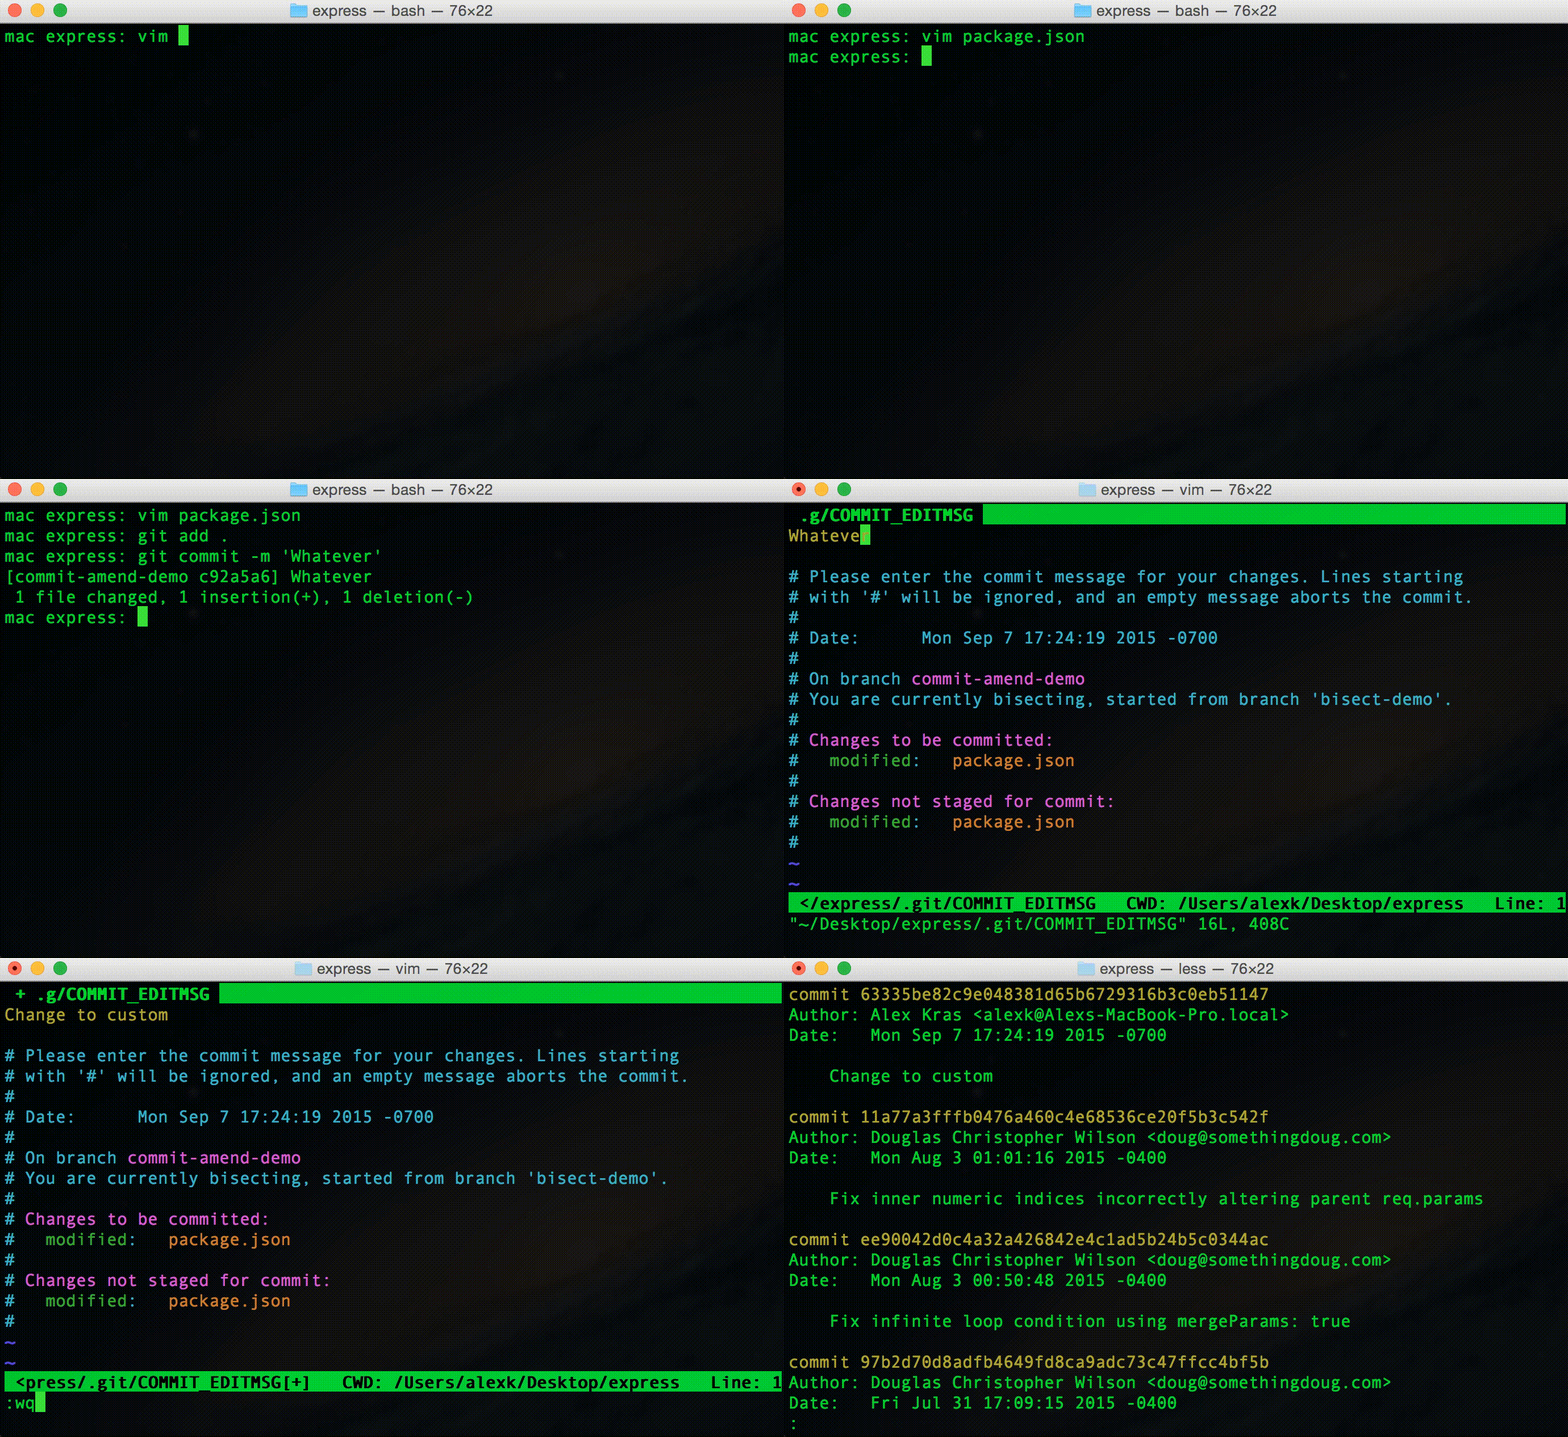
git push -f (-f stands for force), which would over-ride the history. But you WOULD NOT want to do this on a branch that is being used by other people (as discussed in rebase section above). At that point, a “typo” commit, might be your best bet.
https://www.blogger.com/null
9. Three stages in git, and how to move between them
Samplegit reset --hard HEAD and git status -s
As you may already know by now, a file in git can be in 3 stages:
- Not staged for commit
- Staged for commit
- Committed
You can see a long description of the files and state they are in by running git status. You move a file from “not staged for commit” stage to “staged for commit” stage, by running git add filename.js or git add . to add all files at once.
Another view that makes it much easier to visualize the stages is invoked via git status -s where -s stand for short (I think), and would result in an output that looks like that:

git status will not show files that have already been committed, you can use git log to see those instead 
Resetting the files
There are 3 types of reset available in git. A reset allows you to return to a particular version in git history.
git reset --hard {{ "{{" }}some-commit-hash}}– Return to a particular point in history. All changes made after this commit are discarded.git reset {{ "{{" }}some-commit-hash}}– Return to a particular point in history. All changes made after this commit are moved “not yet staged for commit” stage. Meaning you would have to rungit add .andgit committo add them back in.git reset --soft {{ "{{" }}some-commit-hash}}– Return to a particular point in history. All changes made after this commit are moved to “staged for commit” stage. Meaning you only need to rungit committo add them back in.
This may appear as useless information at first, but it is actually very handy when you are trying to move through different version of the file. Common use cases that I find myself using the reset are bellow:
- I want to forget all the changes I’ve made, clean start –
git reset --hard HEAD(Most common) - I want to edit, re-stage and re-commit files in some different order –
git reset {{ "{{" }}some-start-point-hash}} - I just want to re commit past 3 commits, as one big commit –
git reset --soft {{ "{{" }}some-start-point-hash}}
Check out some files
If you simply want to forget some local changes for some files, but at the same time want to keep changes made in other files, it is much easier to check out committed versions of the files that you want to forget, via:
git checkout forget-my-changes.js
It’s like running git reset --hard but only on some of the files.
As mentioned before you can also check out a different version of a file from another branch or commit.
git checkout some-branch-name file-name.js and
git checkout {{ "{{" }}some-commit-hash}} file-name.js
You’ll notice that the checked out files will be in a “staged for commit” stage. To move them back to “un-staged for commit” stage, you would have to do a git reset HEAD file-name.js. You can run git checkout file-name.js again, to return the file to it’s original state.
Note, that running git reset --hard HEAD file-name.js does not work. In general, moving through various stages in git is a bit confusing and the pattern is not always clear, which I hoped is to remedied a bit with this section.
https://www.blogger.com/null
10. Revert a commit, softly
Samplegit revert -n
This one is handy if you want to undo a previous commit or two, look at the changes, and see which ones might have caused a problem.
Regular git revert will automatically re-commit reverted files, prompting you to write a new commit message. The -n flag tells git to take it easy on committing for now, since all we want to do is look.
https://www.blogger.com/null
11. See diff-erence for the entire project (not just one file at a time) in a 3rd party diff tool
Samplegit difftool -d
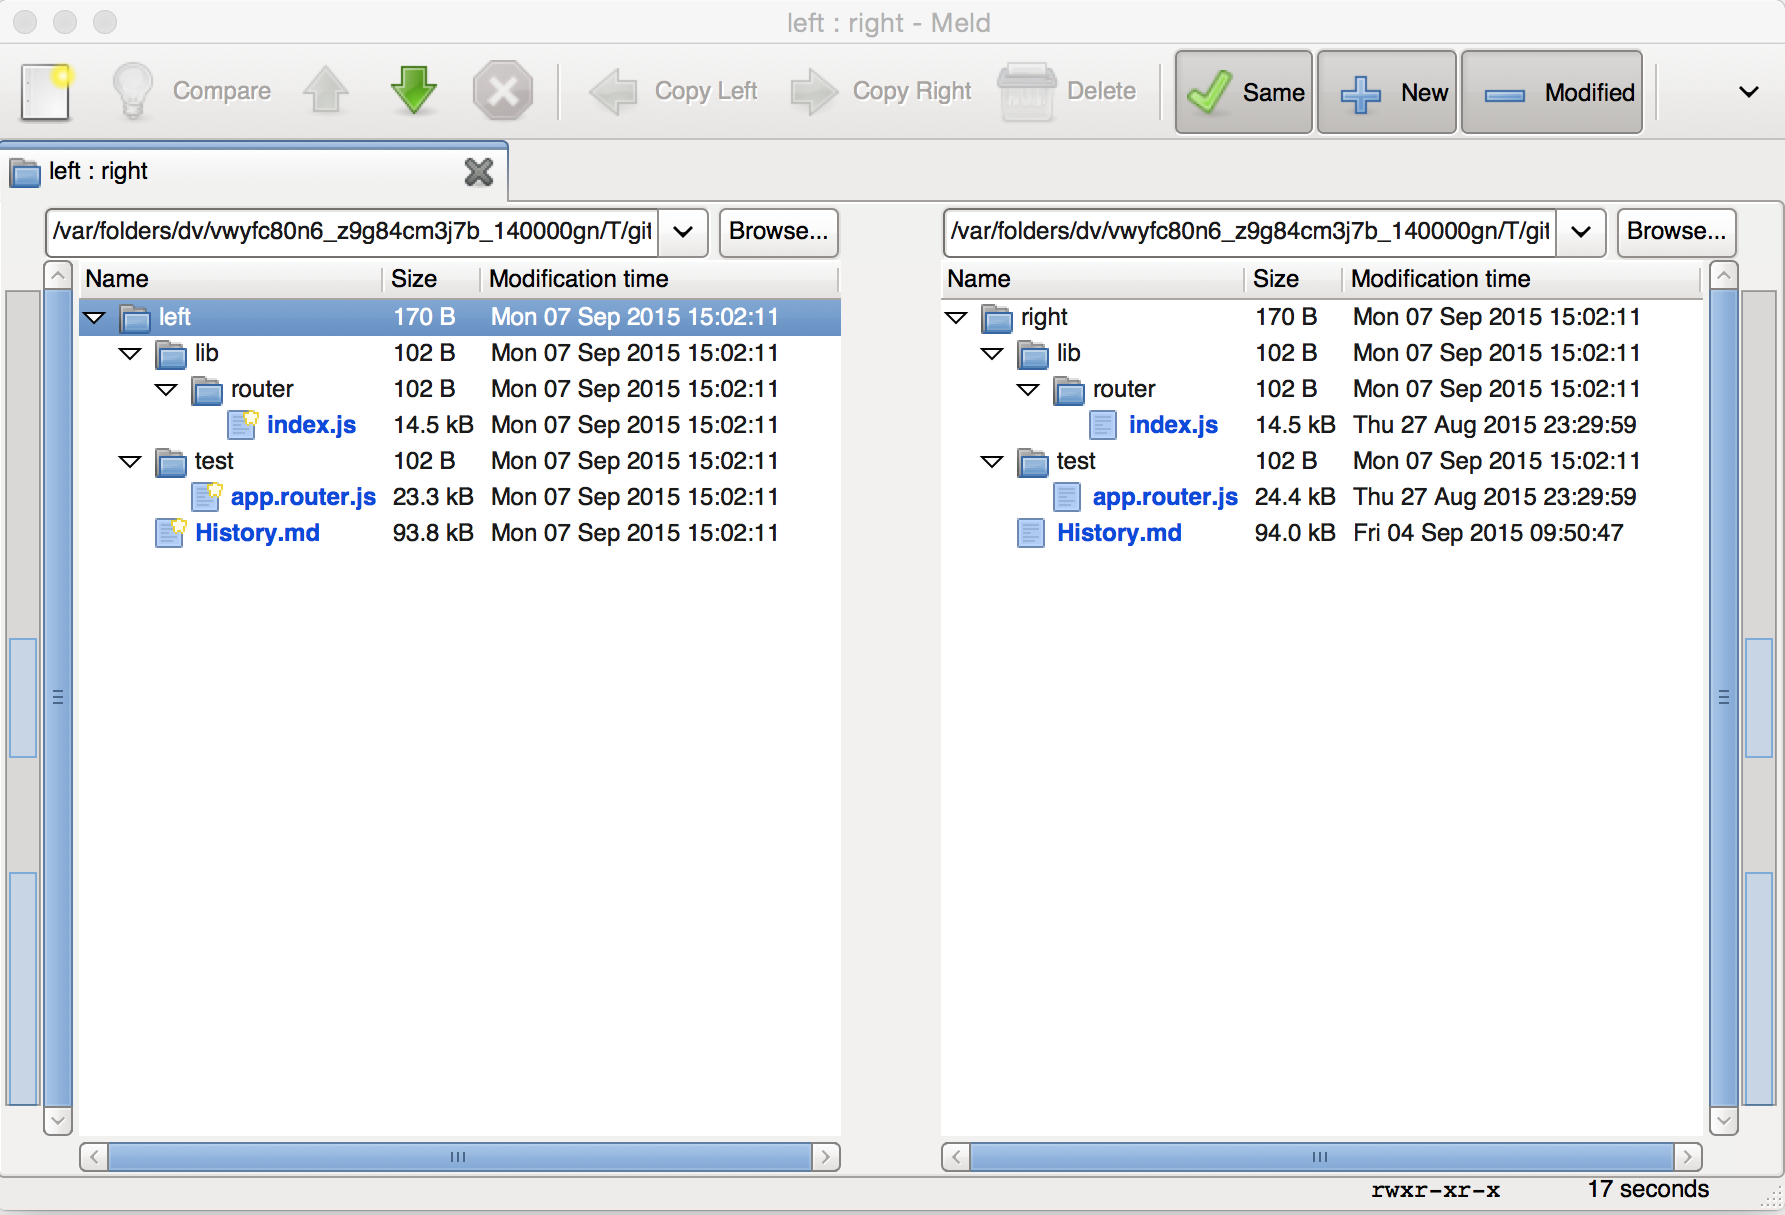
My favorite diff-ing program is Meld. I fell in love with it during my Linux times, and I carry it with me.
I am not trying to sell you on Meld, though. Chances are you have a diff-ing tool of choice already, and git can work with it too, both as a merge and as a diff tool. Simply run the following commands, making sure to replace meld with your favorite diff tools of choice:
git config --global diff.tool meld
git config --global merge.tool meld
After that all you have to do is run git difftool some-file.js to see the changes in that program instead of the console.
But some of the diff-ing tools (such as meld) support full directory diffs.
If you invoke git difftool with a -d flag, it will try to diff the entire folder. Which could be really handy at times.
git difftool -d
12. Ignore the white space
Samplegit diff -w or git blame -w
Have you ever re-indented or re-formatted a file, only to realize that now git blame shows that you are responsible for everything in that file?
Turns out, git is smart enough to know the difference. You can invoke a lot of the commands (i.e. git diff, git blame) with a -w flag, and git will ignore the white space changes.
https://www.blogger.com/null
13. Only “add” some changes from a file
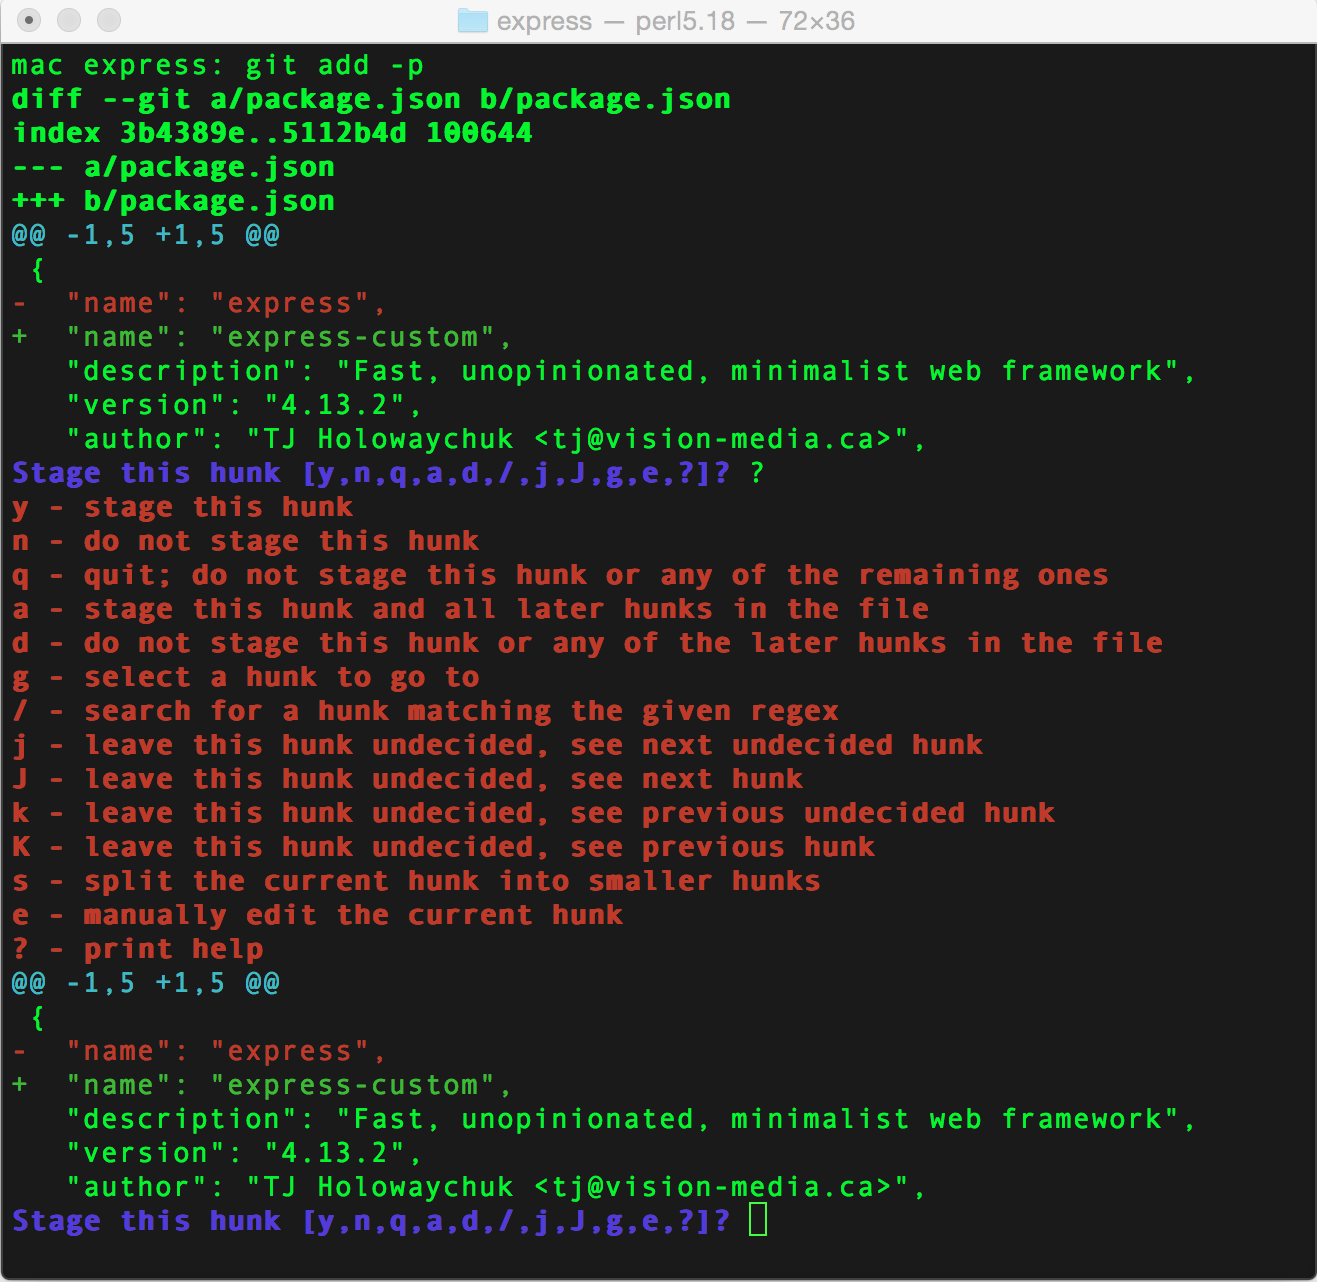
Samplegit add -p
Somebody at git must really like the -p flag, because it always comes with some handy functionality.
In case of git add, it allows you to interactive select exactly what you want to be committed. That way you can logically organize your commits in an easy to read manner.
14. Discover and zap those old branches
Samplegit branch -a
It is common for a large number of remote branches to just hang around, some even after they have been merged into the master branch. If you are a neat freak (at least when it comes to code) like me, chances are they will irritate you a little.
You can see all of the remote branches by running git branch with the -a flag (show all branches) and the --merged flag would only show branches that are fully merged into the master branch.
You might want to run git fetch -p (fetch and purge old data) first, to make sure your data is up to date.
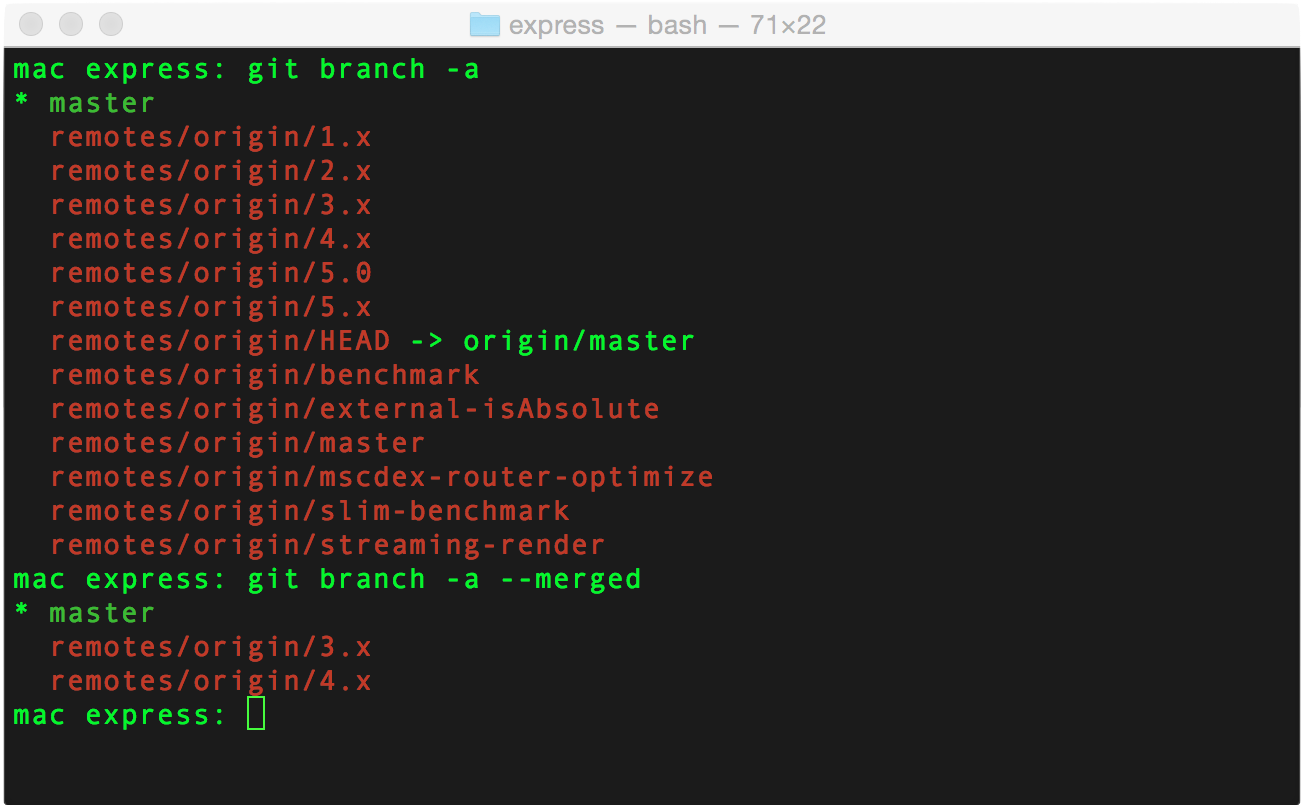
git for-each-ref --sort=committerdate --format='%(refname:short) * %(authorname) * %(committerdate:relative)' refs/remotes/ | column -t -s '*'.

15. Stash only some files
Samplegit stash —keep-index or git stash -p
If you don’t yet know what git stash does, it simply puts all your unsaved changes on a “git stack” of sorts. Then at a later time you can do git stash pop and your changes will be re-applied. You can also do git stash list to see all your stashed changes. Take a look at man git stash for more options.
One limitation of regular git stash is that it will stash all of the files at once. And sometimes it is handy to only stash some of the file, and keep the rest in your working tree.
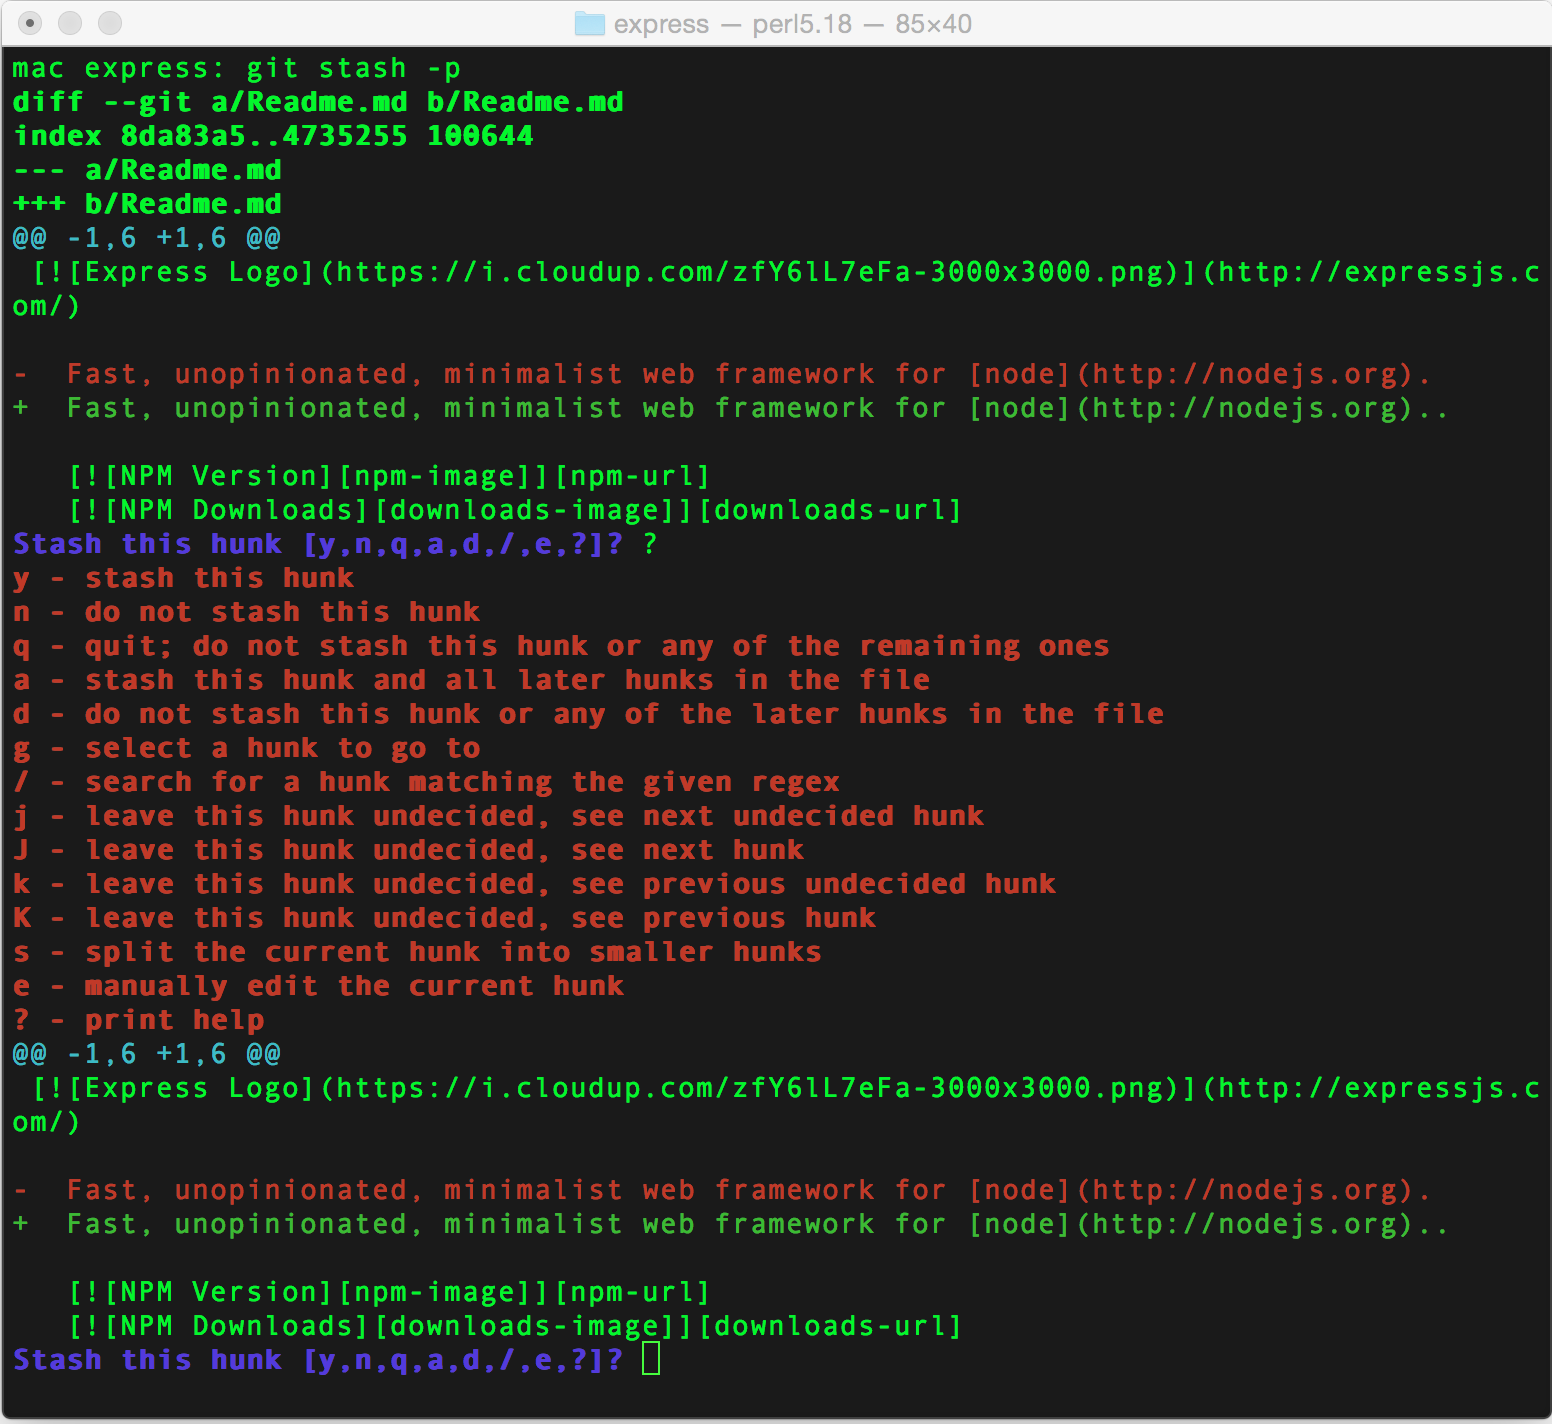
Remember the magic -pcommand? Well it’s really handy with git stash as well. As you may have probably guessed by now, it will ask you to see which chunks of changes you want to be stashed.
Make sure to hit ? while you at it to see all available options.
addthe files that you DO NOT want to get stashed (i.e.git add file1.js, file2.js)- Call
git stash --keep-index. It will only stash files that have not been added. - Call
git resetto un-stage the added files and continue your work.
16. Good commit messages
A little while ago I came across a great article on how to write a good commit message. Check it out here: How to Write a Git Commit Message
One rule that really stood out for me is, “every good commit should be able to complete the following sentence”
When applied, this commit will: {{ ”{{” }} YOUR COMMIT MESSAGE}}
For example:
– When applied this commit willUpdate README file
– When applied this commit willAdd validation for GET /user/:id API call
– When applied this commit willRevert commit 12345
https://www.blogger.com/null
17. Git Auto-completion
Git packages for some operating systems (i.e. Ubuntu) come with git auto completion enabled by default. If your operating system did not come with one(Mac doesn’t), you can easily enable it by following these guidelines: https://git-scm.com/book/en/v1/Git-Basics-Tips-and-Tricks#Auto-Completion https://www.blogger.com/null
18. Create aliases for your most frequently used commands
TLDR; Use git or bash aliases for most commonly used long git commands
Best way to use Git is via command line, and the best way to learn the command line is by doing everything the hard way first (typing everything out).
After a while, however, it might be a good idea to track down your most used commands, and create an easier aliases for them.
Git comes with built in aliases, for example you can run the following command once:
git config --global alias.l "log --oneline --graph"
Which would create a new git alias named l, that would allow you to run:
git l instead of git log --oneline --graph.
Note that you can also append other parameters after the alias (i.e. git l --author="Alex").
Another alternative, is good old Bash alias.
For example, I have the following entry in my .bashrc file.
alias gil="git log –online –graph", allowing me to use gil instead of the long command,which is even 2 character shorter than having to type git l :).
https://www.blogger.com/null
19. Quickly find a commit that broke your feature (EXTRA AWESOME)
Sample:git bisect
git bisect uses divide and conquer algorithm to find a broken commit among a large number of commits.
Imagine yourself coming back to work after a week long vacation. You pull the latest version of the project only to find out that a feature that you worked on right before you left is now broken.
You check the last commit that you’ve made before you left, and the feature appear to work there. However, there has been over a hundred of other commits made after you left for your trip, and you have no idea which of those commits broke your feature.

git blame on the breaking change to find the person to go yell at.
If the bug is hard to find, however, you could try to navigate your way through the commit history, in attempt to pin point where the things went bad.
The second approach is exactly where git bisect is so handy. It will allow you to find the breaking change in the fastest time possible.
So what does git bisect do?
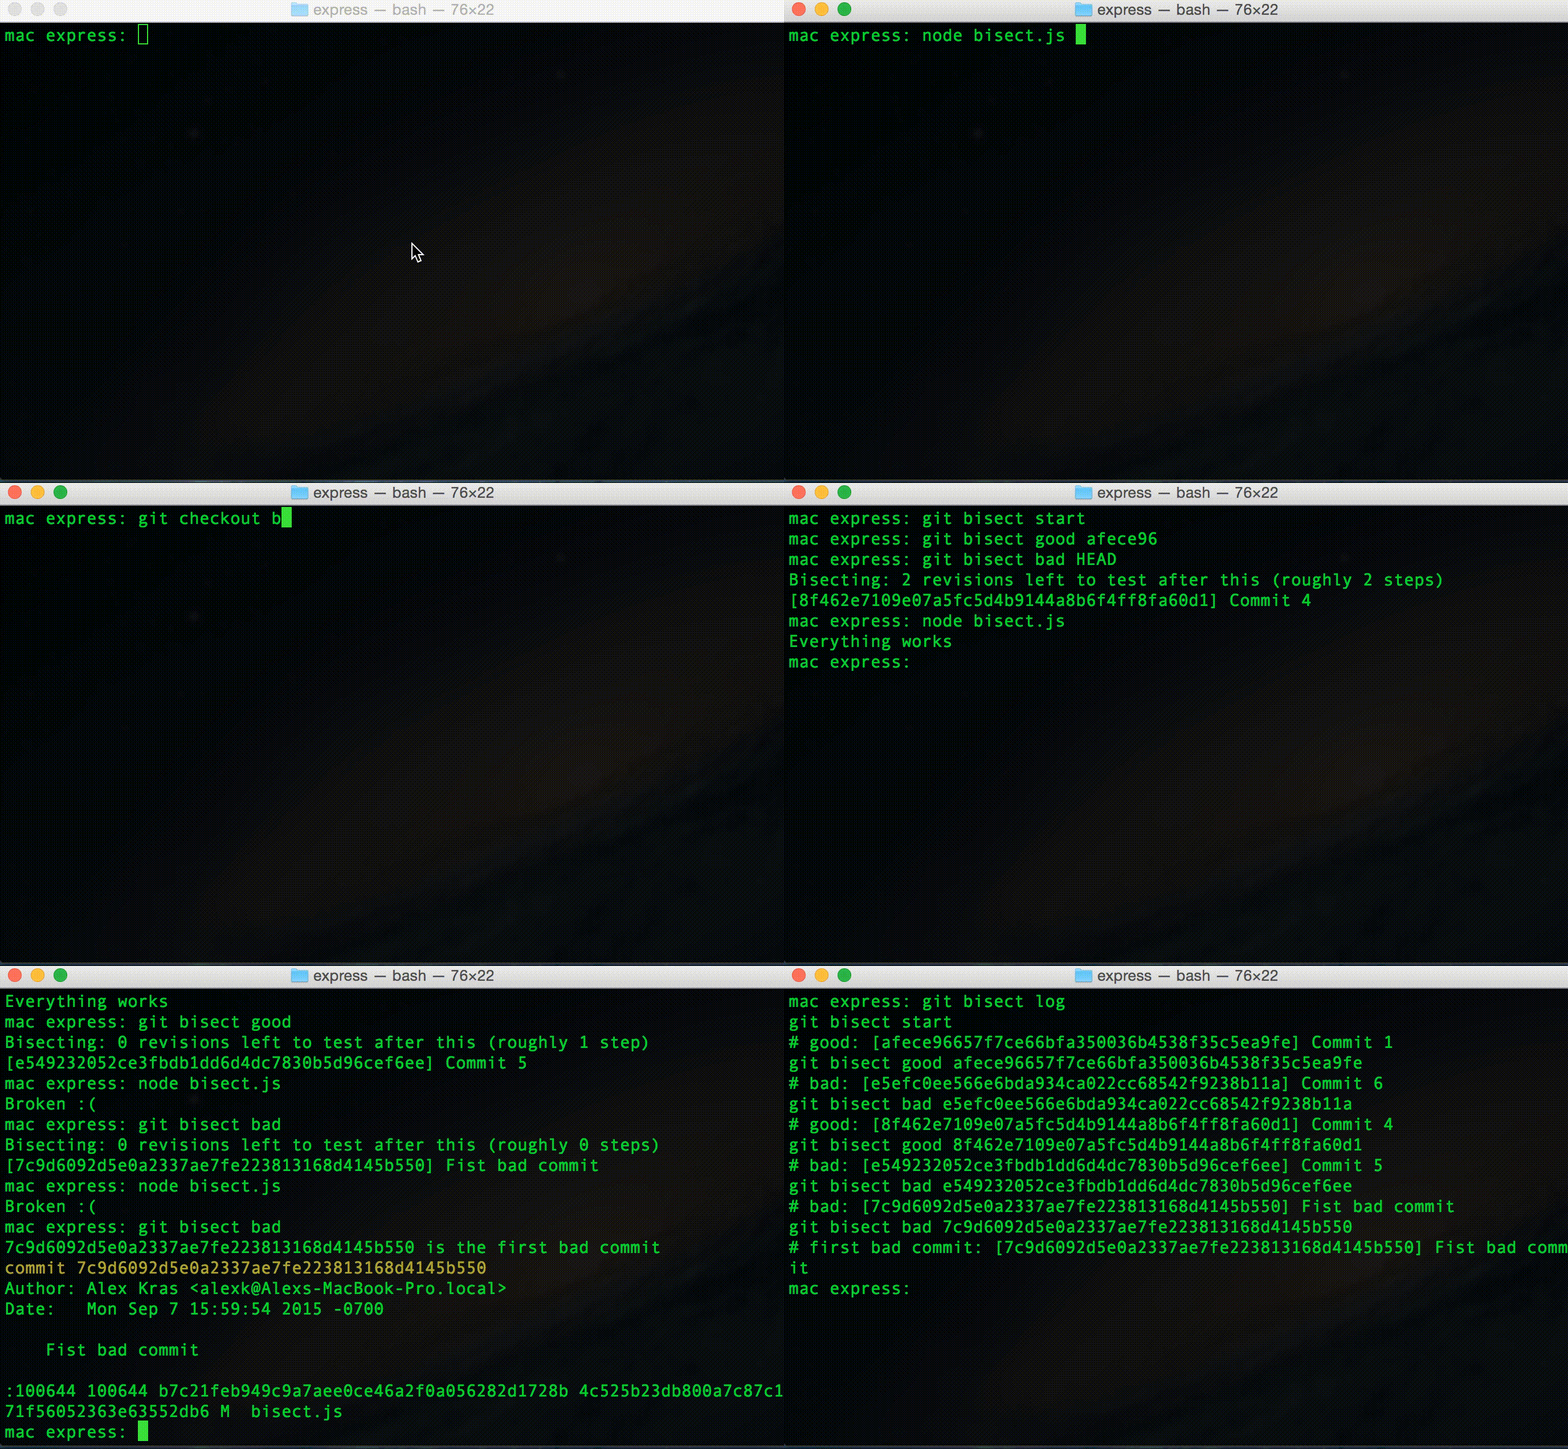
After you specify any known bad commit and any known good commit, git bisect will split the in-between commits in half, and checkout a new (nameless) branch in the middle commit to let you check if your future is broken at that point in time.
Let say the middle commit still works. You would then let git know that via git bisect good command. Then you only have half of the commits left to test.
Git would then split the remaining commits in half and into a new branch(again), letting you to test the feature again.
git bisect will continue to narrow down your commits in a similar manner, until the first bad commit is found.
Since you divide the number of commits by half on every iteration, you are able to find your bad commits in log(n) time (which is simply a “big O” speak for very fast).
The actual commands you need to run to execute the full git bisect flow are:
git bisect start– let git know to start bisecting.git bisect good {{ "{{" }}some-commit-hash}}– let git know about a known good commit (i.e. last commit that you made before the vacation).git bisect bad {{ "{{" }}some-commit-hash}}– let git know about a known bad commit (i.e. the HEAD of the master branch).git bisect bad HEAD(HEAD just means the last commit).- At this point git would check out a middle commit, and let you know to run your tests.
git bisect bad– let git know that the feature does not work in currently checked out commit.git bisect good– let git know that the feature does work in currently checked out commit.- When the first bad commit is found, git would let you know. At this point
git bisectis done. git bisect reset– returns you to the initial starting point ofgit bisectprocess, (i.e. the HEAD of the master branch).git bisect log– log the lastgit bisectthat completed successfully.
You can also automate the process by providing git bisect with a script. You can read more here: http://git-scm.com/docs/git-bisect#_bisect_run
https://www.blogger.com/https://www.blogger.com/https://www.blogger.com/https://www.blogger.com/https://www.addtoany.com/share_save#url=http%3A%2F%2Fwww.alexkras.com%2F19-git-tips-for-everyday-use%2F&title=19%20Tips%20For%20Everyday%20Git%20Use&description=